The Cleaning Academy
Master the Art of Cleaning: A Comprehensive Guide to Learn Effective Cleaning Techniques

Welcome to The Cleaning Academy. The Cleaning Academy is your one stop shop for guides, tips and trick for helping you to keep you home clean and hygienic. We have separated or guide into the main areas found in your home, helping you to easily find the solution to your specific cleaning need. Our guides also help you to identify the relevant products for task at hand, giving you access to best in class products that will get your furniture and fittings looking like new.
Kitchen
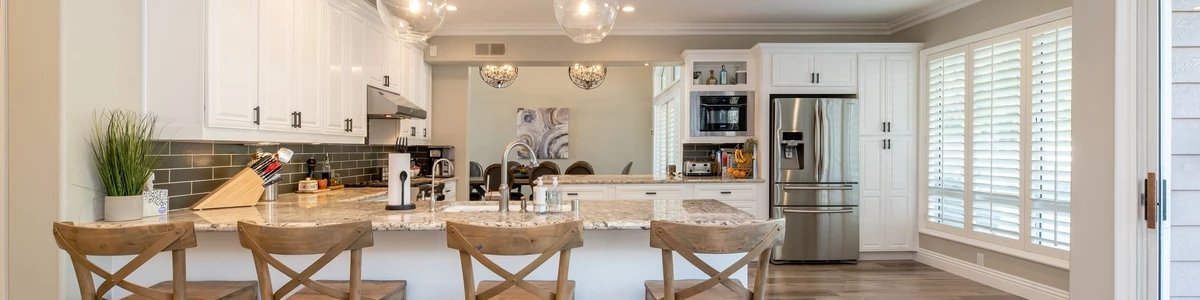
If you are like most people, your kitchen is often the busiest room in your home. Whether you have a family to feed or want to whip up a quick snack, there's always plenty of activities going on in the kitchen. We all want our kitchens to be scrubbed to perfection, so we can whip up healthy meals, store nutritional snacks, or prepare baked goodies for the family.
But do you know how to properly clean your kitchen? cleaning the kitchen is typically one of the least-loved chores in the house, but it doesn't have to be. These tips and tricks will show you how stay on top of your daily kitchen chores, whether cleaning any item, from appliances to flooring!
Kitchen Appliances
Our kitchens are filled with appliances. Each appliance carries out a different function within our kitchen and are primarily related to either preparation or cooking of food and drink. Due to the wide range of appliances available, it can be difficult to know how to clean, and how often to clean, these items.
We've compiled tips on how to clean the most commonly found items below:
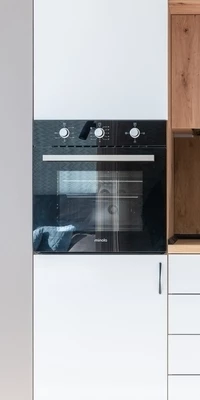
How to Clean an Oven
The oven is a hard-working appliance in your kitchen. From roasting meals to baking cakes and cookies, you'll find that the oven has made many of the culinary masterpieces in your home. But just like any kitchen appliance, it needs occasional maintenance and cleaning to keep it in good working order.
Nobody wants to spend their day off scrubbing ovens and cleaning ovens, yet cleaning the oven is easy, However, it does require some know-how. With the right knowledge and the right tools, you can have your oven sparkling clean in no time.
Cleaning Steps
- Completely empty the oven.
- Preheat your oven for 45 minutes and leave to cool to loosen any baked on food deposits.
- Spray the interior with cleaner in full, using a sponge scourer to remove the deposits. Scrape these into a bin liner..
- Use warm water and dish soap to wipe down the inside of the oven and rinse away any kitchen cleaner residue.
- Clean the oven shelves in a sink of warm water with washing up liquid, using the abrasive side of a sponge scourer. For any extra tough baked on food, try a metal scourer.
- Remove the oven window glass, and clean in a bowl of warm water and washing up liquid. Agitate burnt on food with a sponge scourer.
- To clean your hob, check the manufacturers instructions. If permitted, use an oven paste or degreaser, apply to surface and use to the sponge scourer to clean.
Cleaning Frequency
Wipe down you oven every time you use it. Give your oven a deep clean, removing and washing the oven shelves and window, every month.
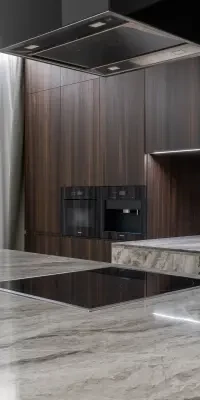
How to Clean a Hob
There are a number of different hobs available, such as induction, ceramic and gas to name a few, each with it's own cleaning requirements. As open top pans are often used on a hob, there's a risk of a spill landing directly on the heated surface and becoming burnt on. Without a swift and proper cleaning method, this may lead to a burning smell and even permanent marking on your hob.
The relevant cleaning method for your hob type can be seen below:
Ceramic Hobs
- Spray with kitchen degreaser and wipe to remove loose debris and buff with a dry cloth.
- Spray lightly with cleaning vinegar, focusing on any burnt-on food.
- Sprinkle with enough bicarbonate of soda to create a fizzing reaction.
- Work the fizzing solution into any stubborn marks using kitchen roll.
- Soak up the remaining cleaning solutions with kitchen roll and give your hob a final wipe down with warm water and washing up liquid.
Induction Hobs
- Use a damp cloth to wipe away any food splatters or spills.
- Spray with a kitchen degreaser and wipe with a microfibre cloth. Wipe away any degreaser residue with a clean cloth.
- Spray the surface lightly with white vinegar
- Buff with a dry cloth using circular motions.
How to Clean Oven Trays
Your oven baking trays can become a real challenge as over time they accumulate thick burnt on food and grime. Most families use them every day, and they can come in all sorts of different materials and sizes.
When it comes to cleaning them, if not done properly it will become harder each time. Simply using a bit of washing up liquid just isn't enough, and those burnt on bits aren't going to make your food taste any better.
Not to worry though, follow the below steps and learn how to clean oven trays today.
- Remove any loose residue on your tray and try and get a few of the big bits off
- Fill your sink with hot water and around a cup of quality baking soda
- Leave it for a good hour, letting the baking soda work its magic
- Give it a scrub with a good quality sponge, working in a circular motion
- Put it through the dishwasher if you have one, if not give it a good rinse off and leave it to dry
Make Your Life Easier
You can delay the need for serious tray cleaning by taking some steps when you cook. We recommend using something like baking/parchment paper as this grabs all the grease and spills from your cooking. You can also use foil but beware as this can stick to your food!
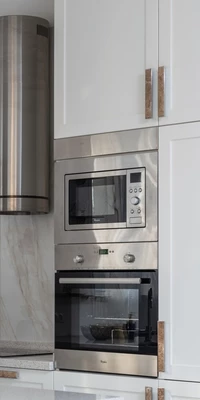
How to Clean a Microwave
If you're like most families, microwaves are a mainstay of your kitchen. They have been around for decades but have recently become more and more popular in recent years. Microwaves are a convenient and quick way to heat up your food and can save us hours each day.
However, are you cleaning your microwave as regularly as you should be? An unfortunate side to microwaves is the grime that builds up inside, which can make the microwave look unsightly and even ruin your food. Follow the below to find out how to clean a microwave in five easy steps:
- Add two tablespoons of bicarbonate of soda to a jug or bowl and add a cup of water
- Microwave on high for 3 minutes, then leave for a further 3 minutes. The inside will steam up and start to loosen burnt on food
- Remove the turntable and then using a kitchen degreaser, spray and wipe the inside of the machine using a sponge scourer. Once burnt-on food is removed, buff with a microfibre cloth to dry.
- Dilute a generous amount of washing up liquid in warm water, then scrub the turntable to clean. Dry before replacing in the machine.
- Clean the exterior with your normal kitchen cleaner and microfibre cloth, using a glass cleaner on the front window to prevent streaks.
Cleaning Frequency
Wipe away spills whenever they occur. Each week as part of your regular cleaning routine, give your microwave a deeper clean by following the 5 steps above.
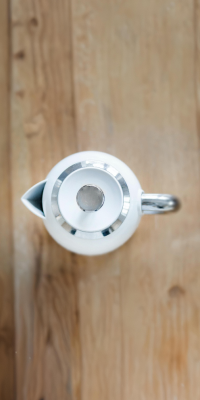
How to Clean a Kettle
One of the main factors in a good cup of tea is making sure your kettle is clean and free of lime-scale, both of which can ruin your brew as mineral deposits make their way into your mug.
Cleaning and descaling a kettle is a difficult task. With the incorrect product, a kettle can be very hard to clean and the process can be long and tedious. However, there are some steps you can take to make it easier on yourself:
- Grab some Oust All Purpose Descaler.
- Half fill your kettle with water and boil, then unplug and place in empty sink.
- Slowly add contents of sachet. Leave for 10 minutes. Use 2 sachets for heavy scale.
- Pour solution away, rinse kettle with cold water, boil again with clean water and rinse again.
Cleaning Frequency
Wipe away spills whenever they occur. Each week as part of your regular cleaning routine, give your microwave a deeper clean by following the 5 steps above.
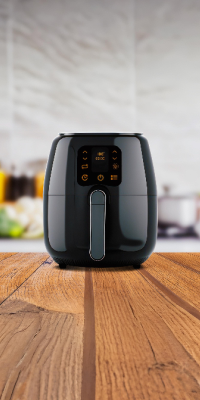
How to Clean an Air Fryer
Air fryers have become kitchen staples, offering a healthier cooking alternative. However, proper maintenance is essential for optimal performance. Follow these steps to clean your air fryer effectively:
- Unplug the Air Fryer: Prioritise safety by unplugging the fryer and ensuring it's cooled down.
- Remove Accessories: Take out the basket and other removable parts for separate cleaning.
- Wipe Exterior Surfaces: Use a damp microfiber cloth to clean the exterior, avoiding electrical components.
- Soak Removable Parts: Let the basket and other parts soak in warm, soapy water to loosen food particles.
- Scrub the Basket: Use a soft-bristled brush or sponge to scrub stubborn residue, optionally using vinegar or lemon juice for tough stains.
- Clean the Interior: Wipe down the interior with a damp cloth, avoiding abrasive cleaners.
- Dry Thoroughly: Ensure all parts are completely dry before reassembling the air fryer.
- Deodorise (Optional): Sprinkle baking soda on the bottom to neutralise odours if needed.
- Reassemble and Store: Put everything back together and store the fryer in a dry place until next use.
Stay connected with The Cleaning Collective for more kitchen cleaning resources and happy frying!
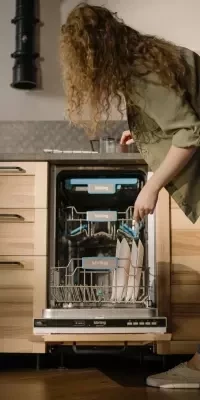
How to Clean a Dishwasher
A dishwasher is one of the most overlooked appliances when it comes to cleaning. It is commonly thought that as a dishwasher is an appliance designed to clean items placed in the machine, with high temperature water, that it cleans itself at the same time as your washing up.
However, this is a common misconception. Like any other area of your kitchen, dirt and grime can build up in crevices and failure to clean can even lead to a shorter lifespan for your dishwasher. We want you to be confident that you are placing your dinnerware, cutlery, mugs and anything else your dish-wash, in a clean hygienic machine. The six steps below will help you keep your machine clean:
- Take a microfibre cloth, and wipe any food particles from the inside of your machine. Wipe these away as and when you see them to prevent build up
- Clean the filter under hot running water, using a fantail brush to agitate stuck-on food debris
- Use a microfibre cloth and a kitchen degreaser to clean the seals around the dishwasher door
- Top up your dishwasher with salt as indicator by the manufacturers instructions.
Follow the above steps every week and every 6 months complete the below:
- Remove the spray arms from your machine for cleaning. Unblock any spray holes that are jammed with food debris using kitchen degreaser for stubborn dirt.
- Run the dishwasher when empty on hot to removing any remaining residues and smells. A dishwasher cleaner will help keep your machine in the best condition and a descaler is required for hard water areas.
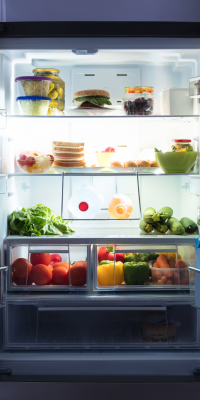
How to Clean a Fridge
The COVID-19 pandemic has emphasised the importance of regular sanitisation and cleaning, including in the kitchen. While you may diligently clean your kitchen counters, oven, and hob, it's easy to overlook the fridge. However, giving your fridge a thorough clean every 3-6 months is crucial to maintain cleanliness, prevent bacteria growth, and avoid cross-contamination with food. Here's a summary of the steps to achieve a sparkling and organised fridge:
- Empty it and discard spoiled items.
- Wash removable parts in hot, soapy water.
- Remove food stains with a wet cloth and scrub gently.
- Use a sanitising solution on shelves, drawers, and racks.
- Clean the interior with soapy water and remove residue.
- Sanitise the interior and wipe it dry.
- Clean the exterior, including the handle and door.
- Vacuum the condenser coils at the back.
- Refill the fridge after it cools down.
- Avoid overfilling and line drawers for easy cleaning.
- Place a ramekin of bicarbonate of soda to absorb odours.
By following these steps, you can achieve a clean, organised, and fresh-smelling fridge. Regular maintenance will help ensure the longevity of your appliance and keep your food safe.
Kitchen Flooring
A dirty kitchen floor can become very noticeable. As food and drinks are prepped, it's likely that spills are going to occur, even if you don't notice them at the time. This can range from coffee, milk or wine spills to small pieces of food that make their way off the side of the kitchen worktop when chopping veg.
Due to the high risk of these spillages, it makes sense to have a hard, easy to clean floor. Common flooring types found in kitchens are tiles, hardwood, laminate, linoleum and vinyl. Each type has pros and cons and the same can be said when it comes to cleaning them, with some being more difficult to maintain that others.
Laminate Flooring
Laminate flooring is a cost-effective alternative to hard wood flooring, giving the look of real wood without the price. When cleaning this type of flooring one key aspect you need to be aware of is moisture. Water can get into the laminate boards and cause them to warp and expand, ruining the look of your floor. Therefore, it is important that you avoid a 'wet wash' and refrain from using a wet mop and a bucket, it could do more harm than good!
Follow the steps below to get your floor clean:
- The best and safest method to clean you laminate floor is to use a vacuum. Vacuum the full surface with the beater brush turned off. If available on your vacuum, use the hard floor setting. Pay attentions to cracks, crevices and edges where food debris can build up.
- For any dirt or soiling on your flooring, dip a microfibre cloth in a bucket of warm soapy water, made by diluting washing up liquid. Wring the cloth so that it is only damp, not wet, then wipe up the spill. Once wiped, take a dry microfibre cloth and dry the floor.
As laminate flooring can be easily damaged by moisture, as soon as anything is spilt on the floor absorb any excess liquid with kitchen roll and clean.

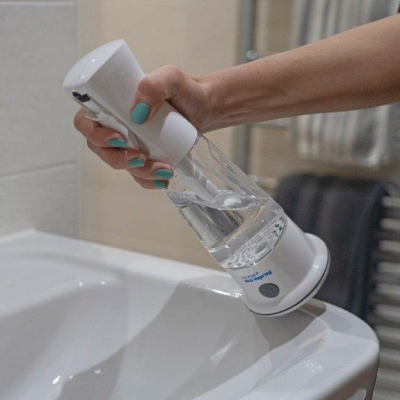
Toucan Eco: Looking To Save Money and the Planet at the Same Time?
Embracing eco-friendly products is essential in today's world, where environmental consciousness is paramount. This is where Toucan Eco comes in. Toucan Eco offers a ground-breaking solution that combines cleanliness and environmental responsibility. By harnessing the power of electrolysis, this innovative system produces an endless supply of eco-friendly antibacterial cleaner while saving on plastic waste and catering to hypoallergenic needs.
The core of Toucan Eco lies in its revolutionary technology, which transforms tap water, table salt, and electricity into a highly effective cleaning solution without harmful toxins or chemicals. This means you can confidently clean any space, knowing that you're not compromising your health or the environment.
Key Benefits:
- Endless supply: Toucan Eco allows you to produce your own eco-friendly antibacterial cleaner whenever needed, eliminating the need for constant purchases and ensuring you never run out of cleaning solution.
- Environmental sustainability: By using Toucan Eco, you significantly reduce plastic waste by eliminating disposable bottles common in commercial cleaning products, helping protect the environment and reducing your carbon footprint.
- Cost-effective: Toucan Eco provides substantial long-term savings. By producing your own cleaning solution, you eliminate the need for constant purchases, resulting in significant financial benefits.
- Hypoallergenic: Toucan Eco's naturally chemical-free and hypoallergenic properties make it an excellent choice for individuals with sensitive skin or allergies. Clean your surroundings with peace of mind, knowing you're not exposing yourself to harsh chemicals or allergens.
- Versatility: Toucan Eco's eco-friendly antibacterial cleaner is suitable for various surfaces and environments, making it a versatile solution for cleaning countertops, floors, appliances, and even shoes, sofas, and food.
By choosing Toucan Eco, you're not only saving the planet but also your wallet. Say goodbye to compromise and embrace a cleaner, healthier, and more sustainable future.
Bathroom
Cleaning the bathroom may seem like a daunting task, but it doesn't have to be. If you've been struggling to keep your bathroom clean, this section is for you! Cleaning the bathroom is a task that nobody looks forward to, but it’s also a task that is vital to our health and well-being. A clean bathroom not only removes dirt and sweat from the air, which can lead to coughing, sneezing, and other conditions, but it also helps bacteria from fecal matter stay in the toilet where they belong.
In it, we'll outline all the different ways you can make sure it stays spotless, from cleaning surfaces and floors with an every day degreaser to spraying down your toilet with a bacteria eliminating sanitiser. A properly cleaned bathroom is a necessity for health, comfort, and safety. With the help of these quick tips, you'll be able to clean your bathroom with ease!

How to Unblock a Drain
We have all experienced a clogged drain at one point or another, they can be a huge inconvenience and the cost of hiring a professional to come and fix it can be high.
A blocked drain can cause flooding, put pressure on the rest of your plumbing, and even lead to mold or mildew growing in your home. With the help of some essential drain unblocking tools and chemicals, you may be able to fix your blocked drain yourself!
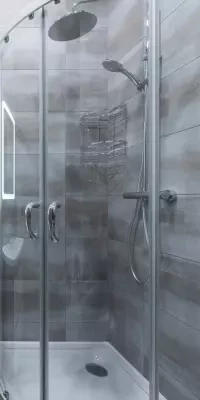
How to Clean Your Shower
It can't be denied: cleaning your bathroom is a dirty job. One of the most dreaded tasks is cleaning and disinfecting your shower and bathroom floor.
Cleaning your bathroom is a time-consuming process, but if you are not careful it can lead to the growth of mould and mildew that can irritate your skin or your respiratory system.
This article will walk you through the steps to clean a shower in order to avoid these irritations.
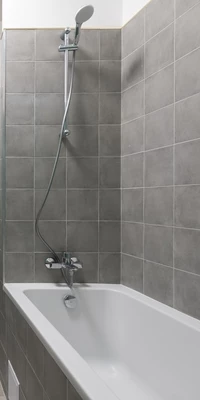
How to Clean a Bathtub
Bath tubs can be a challenging clean. After all, they are often exposed to a considerable amount of dirt and body fats, then throw in limescale build up and you've got yourself a challenge. On top of this, what goes down the plug hole often causes blockages, including hair and soap build up.
Routine cleaning will help you keep on top of these problems, leaving you a clean and shine bath that is infinitely more relaxing next time you hop in the tub.

How to Clean a Shower Curtain
The shower curtain is a vital part of any bathroom, yet it often gathers soap scum, stains, and mildew. Regular cleaning is essential not just for its appearance but also for hygiene. To effectively clean and refresh it, carefully remove the curtain, inspect for damage, categorise by material, and clean accordingly.
For fabric curtains, machine wash with mild detergent and air dry; for vinyl or plastic, soak, scrub, and air dry. Spot clean with baking soda/water or vinegar/water for stains, ensure thorough drying, consider a mildew-resistant spray, and improve ventilation to prevent future mildew.
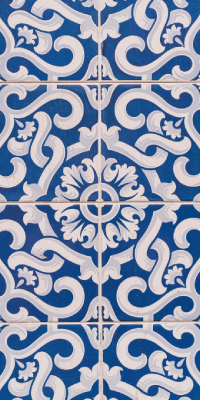
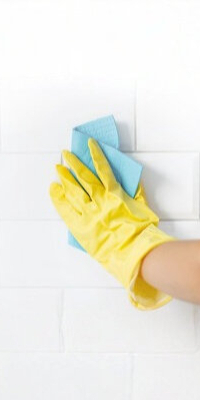
How to Clean Bathroom Tiles
Starting to see signs of mould in your grout? Things like soap, shampoo, dust and moisture can all turn your bathroom into a bit of a mess. Keeping on top of your bathroom tiles will make the whole room look a little nicer, and whether you are a business or homeowner these tips are sure to help you out.
A good place to start with your bathroom tiles would be a vinegar and water solution, as vinegar is a great all-round cleaner. This article will help you start to learn how to clean bathroom tiles today.
How to Clean Grout
Keeping grout clean doesn’t have to be a daunting task. With the right products and a simple routine, you can maintain spotless grout lines in your bathroom.
To clean grout effectively using The Pink Stuff Miracle Cleaning Paste, start by scooping a small amount onto a damp cloth or sponge scourer. Gently scrub the grout using small circular motions, focusing on discoloured areas to remove stains thoroughly. Once clean, wipe away any residue with a clean, damp cloth and rinse the area thoroughly with water. Finally, take a moment to admire how brilliantly clean your grout looks after just one use.

How to Remove Mould
Mould poses various hazards to both human health and property. Exposure to mould can lead to a range of health issues, particularly for individuals with allergies or respiratory conditions, causing symptoms such as nasal congestion, throat irritation, coughing, wheezing, or skin irritation. Prolonged exposure to certain types of mould, such as black mould (Stachybotrys chartarum), can result in more severe health complications including chronic respiratory issues and even neurological problems in some cases.
Overall, the dangers of mould emphasise the importance of preventing its growth and promptly addressing any infestations to safeguard both health and property.
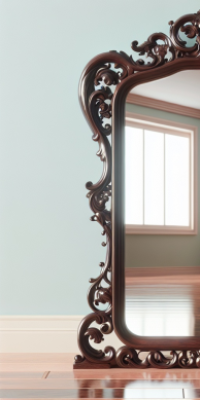
How to Clean a Mirror
Cleaning a mirror goes beyond just eliminating smudges and streaks; it ensures a clear reflection, maintaining not only its aesthetic appeal but also its functionality. A clean mirror not only enhances the visual aspect of a room by providing a crisp reflection but also contributes to the overall ambiance and cleanliness of the space.
Apply the glass cleaner directly onto the mirror's surface or onto your cleaning cloth, then wipe away grime in a zigzag motion from top to bottom using the microfiber cloth or paper towels. Check for streaks or spots after the initial wipe, and touch up any areas as needed. For an extra shine, gently buff the mirror with a dry cloth.
Laundry Room
In today's fast-paced, time-strapped world it can be difficult to find the time to do household chores when you're busy from morning until night. The one task people often put off is laundry, but that doesn't have to be the case.
Laundry day is an essential part of most people's lives, but it can be time-consuming and quite a stressful time. You have to figure out which detergent to use, what the best way to wash your clothes is, and how you're going to organise everything until they're washed.
Luckily we've compiled the best laundry tips to keep your clothes looking good and smelling fresh!
Laundry rooms can also be a smelly, cluttered mess that's a nightmare to clean up. We'll help you to keep your laundry room clean and organised with a range of tips and tricks.
A Smarter Approach to Laundry
Doing laundry isn’t just about cleaning clothes - it’s about caring for your fabrics, your machine, and your time. With the right approach, you can extend the life of your garments, reduce energy use, and keep your washing machine in top condition. Our tips and services are designed to help you make laundry day easier, more effective, and better for both your home and the environment.
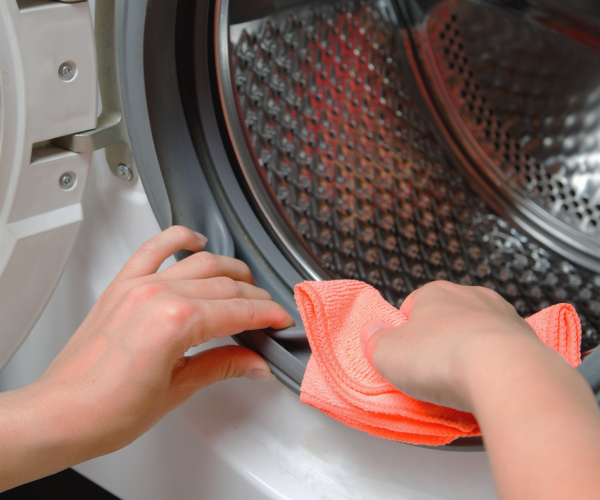
How to Clean a Washing Machine
Washing machines are one of the most expensive and long-term appliances in your home. Protect them and save money by understanding how to keep your machine clean and fully optimised.
Have you ever noticed that your washing machine has a lot of built up gunk on the inside lining? Are your clothes coming out too wet due to a dirty filter? This is because there are a few spots in your washer where detergent, fabric softener, and other nasty build-up can get stuck. Limescale can also build up in your machine, and you may not even see be able to see it. Regular cleaning helps to keep your machine from costly breakdowns and will extend it's life span. After all, we all want to save money and have our clothes come out of the wash clean - not smelling like mouldy dishwater!
If you're looking thinking to yourself 'how do I clean a washing machine?', then this article is for you! It will show you how to get your washer up and running in no time, with simple steps that will keep your clothes clean and your home happy.
Washing Machine Filters
Wondering how to clean a washing machine filter? Read our blog and learn the steps involved in cleaning a washing machine filter. All it takes is removing from the machine, draining some water, washing the filter and the screen, and cleaning the hole where it sits.
Choosing Bio or Non-Bio Detergent
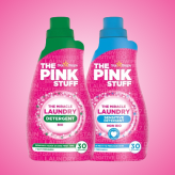
Choosing a laundry detergent can be complicated. Do you need a natural detergent? What about an eco-friendly detergent? These are just some of the questions that could be on your mind when choosing what to spend your money on. In this article, we will discuss the five things you should consider when selecting a washing detergent!
What Is Laundry Detergent and What Does It Do?
Laundry detergent is a type of soap that is designed to remove stains and odors from clothes as well as other laundry items such as towels and rags. It makes it easier for people to clean their clothes without having to use harsh chemicals, so it's often used by those who want to keep their clothes looking like new for longer.
What Type of Laundry Detergent Should I Pick?
Laundry detergent come in a number of forms, including liquid, powder, capsules or tablets. A number of recognised brands offer detergent in each these forms, with the choice of what type to use often being personal preference.
Tablets and capsules do not require any measuring, you simply pop a tablet or capsule in the washing machine and turn on the machine. Tablets/capsules are often "3in1" (or more), often including fabric conditioner, whitener or other benefits.
Laundry liquid and powder can be added to the drawer of your washing machine, and offers an controlled way for the product to be automatically added to wash at the right time during the cycle. Also, some clothes must be washing to specific instructions, such as "do wash using laundry conditioner", which you can omit from adding to the drawer.
Should I Pick Bio or Non-Bio Detergent?
Bio washing detergent includes enzymes that break down proteins, speeding up the stain removal process when washing clothes. These products also clean better at lower temperatures.
Non-bio doesn't include these enzymes and are the best choice for people with allergies or sensitive skin. Non-bio is also suitable for washing delicate fabrics such as silk and wool, both which contain proteins that can be broken down by bio detergent.

How to Clean an Iron
Ironing is a highly disliked chore in the UK due to its time-consuming nature, often leading to frustrations such as accidentally marking clothes. To avoid these issues, it is crucial to maintain a clean iron. Before cleaning, ensure the iron is unplugged and cooled. While specialized cleaning products are available, common household items like vinegar, baking soda, and toothpaste can effectively clean the iron's soleplate. For light cleaning, use soapy water with a sponge, while toothpaste can address stubborn stains. Vinegar mixed with salt is also effective for removing persistent marks and residues.
Descaling is another essential maintenance task, especially if you notice limescale build-up around the steam vents, which can hinder the iron's performance. You can descale using a vinegar and water mixture or a specialized descaling product like Oust. For vinegar, mix equal parts with water, pour into the iron's tank, and use steam to flush out the limescale. Alternatively, Oust provides a quick solution by filling the iron's chamber with the product, letting it sit, and then rinsing thoroughly. Both methods ensure your iron stays in good condition, preventing issues like chalky residues and maintaining efficient performance.
Stain Removal
Ever been in a situation where you have tried everything to get a stain out of one of your favorite pieces of clothing? Every time the stain reappears, it feels like there is nothing left to do but throw that piece out. Thankfully, there is help on the way - our laundry guides will help you to remove even the most difficult soiling from a range of items.

How to Remove Blood Stains
When you have a blood stain, it can be difficult to know how to get rid of it. Blood stains are one of the most difficult stains to clean and can ruin your clothes, sheets, and furnishings, known for its ability to permanently stain surfaces.
Blood can harbor many types of microorganisms that are dangerous to your health. That's why it's important to remove blood from clothes. It's not just the blood itself that can carry pathogens, but also any other fluids that may have come into contact with the open wound. Some bacteria and viruses, for example, can survive outside of a host for days and even weeks if they're surrounded by the right environment.
Our post will teach you how to remove blood stains from clothing, sheets, surfaces, and upholstery. Luckily, there are a few methods that will work for most types of stains.

How to Remove Tea and Coffee Stains
There are many stains that we come across in our day-to-day life. And just like most stains, tea and coffee stains can be very stubborn and hard to remove.
We all love a good cup of coffee or tea, but if you're not careful, they can end up making stains on your clothes, soft furnishings (such as your sofa) and carpets. Spills occur for a number of reasons: we knock a cup off a coffee table, the lid isn't on our takeaway coffee cup correctly or we're a little and try to carry too many cups at once!
Cleaning tea and coffee stains is not a pleasant job. In fact, many people avoid it until it becomes absolutely necessary or until they have a visitor. In this article, we'll go over which of our products work best on tea and coffee spills and help you remove the toughest stains!

How to Remove Red Wine Stains
When you spill wine on your favourite white shirt, couch cushion, sofa or any other material, it can be a really frustrating moment. Wine is a delicious drink, but it's also a difficult one to clean up. The colour of the wine can stain any surface it comes into contact with, and if you leave that spot long enough, those stains can set in and be nearly impossible to remove.
Tannins are among the most well-known components of wine and are a natural phenolic compound found in plants, animals and fungi. These plant-based molecules, which add flavour and body to a wine, are also the component that creates major stain removal challenges if a spill occurs.
Our guide will give you all the tips and tricks you need to remove those stubborn stains and return stained items back to their original condition.
Living Room
A clean living room is the first step to a clean house. Keeping a living room clean is no easy task, as it's one of the busiest rooms in the entire house. Between guests and kids and pets, not to mention objects like decorations and furniture, there's always something for you to clean up before your guests arrive or before you sit down at the end of a long day.
One way to clean up your living room is to get rid of any clutter. This can be done by removing things like papers, furniture, and other unnecessary items. Another way to make the space feel cleaner is to rearrange what you already have in your living room in order to maximise the space in an attractive way.
Cleaning is important because it can prevent the spread of infection, bacteria and even diseases. It also helps to keep your home looking neat and tidy, enhancing your sense of order and control. A clean environment can make you feel more comfortable, reduce stress, and prevent sickness. Our guides to living room cleaning will make sure you've got all the tips and tricks you need to maximise the time you spend cleaning and help you to get the most benefit from the process!
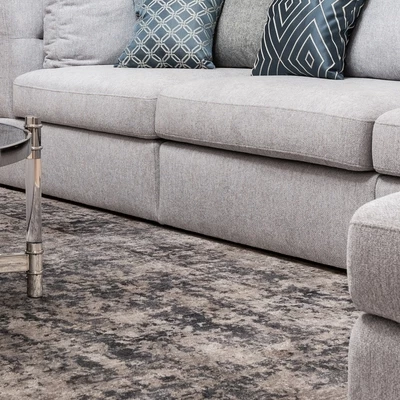
Living Room Flooring and Rugs
Living room flooring and rugs take up a significant portion of visual space, making regular cleaning essential to keep the area looking fresh and inviting. As high footfall zones where food and drinks are often consumed, these surfaces are especially prone to spillages. Such accidents can lead to stains that are difficult to remove, affecting both hard floors and soft furnishings like rugs. If not cleaned promptly using appropriate methods, these stains can become permanent, diminishing the aesthetic appeal of your space. In severe cases, flooring or rugs may need to be replaced - a costly process when factoring in both materials and professional labour.
Cleanliness also plays an important role in safety. Hard flooring, in particular, can become slippery after spills or when cleaning products settle on the surface. For instance, it's not uncommon for furniture polish overspray to land on the floor, creating a slick surface that increases the risk of slips and falls. Rugs, while adding warmth and comfort, can also pose a hazard if they shift or curl, so securing them properly and keeping them clean is key to maintaining a safe and visually appealing living room environment.
How to Clean a Carpet
Due to the living room being an area that sees high foot traffic in your home, studies have shown carpets to be up to 10x dirtier than a toilet seat!
In big households where the living room receives heavy use, with kids and pets present, it is recommended that you vacuum daily. Otherwise, once a week will keep you living room clean. If your carpet is manufactured using synthetic and plant-based carpet fibres, turn on the beater brush and vacuum across the floor in different directions to remove all dust and dirt. For high pile or wool carpets make sure that the beater brush is turned off, and when vacuuming follow the direction of the fibres. To freshen your carpet sprinkle with baking soda and mist the surface with plain water and leave for two hours prior to vacuuming.
To deep clean your carpet, you will need a carpet cleaning machine. These are often available to hire locally, or you can even purchase your own machine. Use a quality carpet cleaning solution and if you have a wool carpet, use a wool-safe product such as 1001 Carpet Machine Solution.
Stain Removal
Stains often occur due to a spilt drink and to increase the chances of removing any staining completely, it's important to treat spillages as quickly as possible. Ideally, you should treat any spillage straight after it occurs.
Use kitchen roll to soak up as much of the spill as possible in an attempt to prevent it from soaking further into the carpet. Blot the stain to draw it out of the carpet, do not scrub. Scrubbing can actually work the stain further into the fibres! Follow this with a treatment using a carpet cleaner such as Dr Beckmann Carpet Cleaner, and for any dried on stains you can use the attached brush to help work the cleaner in.

How to Clean Laminate Flooring
Laminate floor adds a touch of luxury to your home, at a more affordable price than solid wood. This makes laminate a popular choice and just like every type of flooring, regular cleaning will keep it looking like new and expand it's lifespan.
For regular cleaning of a laminate floor, simply vacuum the surface whilst paying attention to any crevices such as the join between the planks. Ensure that you turn off the beater brush when vacuuming. If your vacuum cleaner has a hard floor setting, turn this on. You can also use a soft bristled brush to clean laminate flooring.
If your floor requires a deep clean, vacuum/brush the floor first and then use a microfibre flat mopping system such as a Robert Scott Microspeedy or Robert Scott Pro-Mist. When using the mop, never over wet a laminate floor. Too much water can cause laminate to warp and crack and can be absorbed into the planks. Use a cleaning product that is safe for use with laminate flooring such as The Pink Stuff All Purpose Floor Cleaner, spray sparingly and mop.
Spills and Ground in Dirt
As liquids can easily damage laminate flooring, if a spill occurs clean this straight away using kitchen roll to absorb excess fluids.
If any soiling remains following a spill, or dirt has attached to the surface of your floor, use a microfibre cloth that has been dipped in warm soapy water and rung out to wipe this off. Once wiped, use a dry cloth to wipe away any moisture or residue that is left.
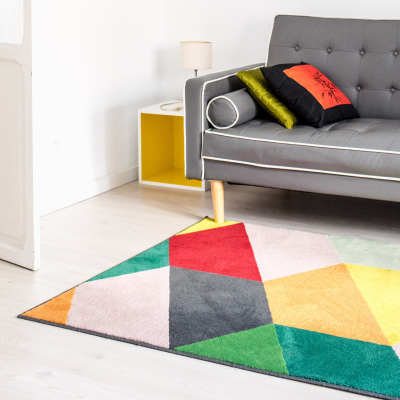
Shag Rug Cleaning
To clean a shag carpet effectively, start by preparing the area and removing any furniture or objects that might obstruct access to the rug. Next, thoroughly vacuum the carpet in multiple directions to remove loose dirt and debris. For spot cleaning stains, gently blot the affected area with a mixture of mild detergent and warm water, avoiding rubbing to prevent damage or spreading the stain. Rinse with a damp cloth to remove any soap residue.
Depending on the size and care instructions of your shag carpet, you can choose between using a carpet cleaner machine, steam cleaner, or hand-washing method. When using a carpet or steam cleaner, carefully follow the manufacturer's instructions, filling the machine's reservoir with the recommended cleaning solution or warm water. Pass the cleaner over the rug slowly and evenly in small sections, being mindful of not using excessive moisture. Allow the carpet to dry thoroughly before placing furniture back or walking on it.
For smaller shag rugs, hand-washing can be a suitable option. Fill a large container or bathtub with lukewarm water and mild detergent, creating suds. Submerge the rug and gently move it around to ensure all areas are soaked and cleaned. Avoid twisting or wringing the rug to prevent damage. Drain the soapy water, rinse the rug thoroughly with clean water, and press out excess water. Hang the rug in a well-ventilated area to dry.
Finally, ensure the shag carpet is completely dry to prevent mould or mildew growth. You can hang it outdoors in a shaded area or lay it flat on a clean surface. Using fans to aid in the drying process is helpful, but avoid using direct heat sources such as hairdryers.
Seriously Sparkling Sofas
Your sofa is the heart of your living room - a cosy spot for relaxing, entertaining, and unwinding at the end of the day. But with all that use, it’s also one of the quickest places to collect dust, crumbs, pet hair, and everyday grime. Without proper care, upholstery can start to look tired, feel unclean, and even harbour allergens or odours.
Our professional sofa cleaning service brings tired seating back to life, lifting stains, removing deep-set dirt, and restoring freshness. Whether your sofa is fabric, leather, or anything in between, we use safe, effective methods tailored to your furniture. Because a clean sofa isn’t just nicer to look at - it’s a more comfortable, healthier place to relax.
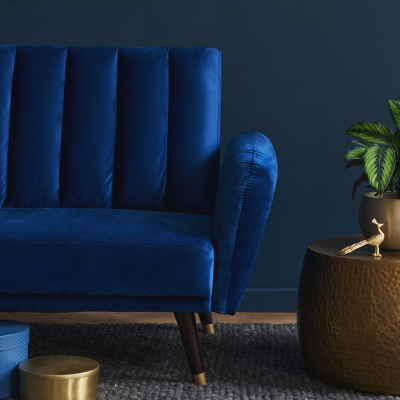
How to Clean a Velvet Sofa
A velvet sofa is a luxurious and stylish addition to any living space, but it requires proper care and maintenance to preserve its beauty and extend its lifespan. Regular cleaning is essential to keep your velvet sofa looking fresh and free from dirt and stains.
To clean your velvet sofa, start by carefully reviewing the manufacturer's instructions for cleaning and maintenance. Different types of velvet may require specific cleaning methods or products. Remove loose dirt and debris by gently vacuuming the surface with a soft brush attachment, being careful not to damage the delicate fabric.
Address stains promptly by blotting them gently with a clean, white cloth or paper towel. Avoid rubbing the stain to prevent it from spreading or pushing it deeper into the fabric. Test any cleaning products on a small, inconspicuous area before using them on the entire sofa to ensure they don't cause colour fading or fabric damage.
Choose a high-quality velvet upholstery cleaner and apply it to a clean, soft cloth to gently blot the stained or soiled areas. Avoid saturating the fabric and use light, circular motions. Allow the sofa to air dry naturally, avoiding direct heat or hairdryers that can damage the fabric. Use fans or open windows to promote air circulation and speed up the drying process.
To restore the softness and appearance of the velvet, gently brush the fabric with a velvet brush or a clean, soft bristle brush. Follow the natural flow of the fabric and remove any remaining debris with a lint roller or adhesive tape if necessary.
Prevention is key to maintaining the cleanliness of your velvet sofa. Avoid eating or drinking on the sofa and use decorative throws or covers to protect it from pets or sharp objects. Regular dusting and vacuuming will help prevent dirt and debris from settling into the fabric.

How to Clean a Fabric Sofa
If you're looking for tips on how to clean a fabric sofa and make it look fresh and vibrant, we've got you covered. Here's a summary of the essential steps you can take using baking soda and cleaning detergents:
- Before you begin, always check the care labels on your sofa and test any cleaning products in an inconspicuous area to avoid potential damage.
- For regular cleaning, start by using a dry brush to remove loose particles and then use a stiff brush to gently loosen any stains or dirt. Vacuum the sofa thoroughly, including underneath the cushions. To deodorise, sprinkle baking soda over the surface, leave it for 15-20 minutes, and then vacuum it away.
- To remove stains, act quickly and use kitchen roll to soak up excess liquids or solids. Check the manufacturer's recommendations and test cleaning products on an inconspicuous area. Use a dry brush to agitate the stain, then vacuum to remove any particles. Spot treat the stain with a recommended agent, such as Prochem Stain Pro, and blot with a microfiber cloth.
- When cleaning fabric sofa cushions, remove them and vacuum all sides using a brush attachment. Spot-clean any stains with the stain spray, then allow the cushions to air dry. If permitted by care instructions, you can wash the cushion covers in the washing machine using a suitable detergent.
- For washing couch cushion foam, vacuum to remove loose dirt, then make a mild detergent solution with white vinegar and cold water. Blot stains on the foam using a microfiber cloth dipped in the solution, dry with a clean towel, and let it air dry for 24 hours before placing it back on the sofa.

How to Clean a Leather Sofa
Maintaining a leather sofa doesn't have to be expensive or complicated. With the right cleaning products and some basic care instructions, you can keep your leather sofa looking like new for years. Here's a summary of the cleaning process:
- Start by removing everything from the sofa, including cushions, pillows, and blankets. If they're machine washable, take them off and clean them separately.
- Use a vacuum cleaner with a soft brush attachment to gently remove loose dirt and dust from the surface of the sofa. For leather sofas, use a crevice tool to clean between the cushions and seams.
- Dampen a microfiber cloth with warm water and wipe the leather surface to remove excess dirt. Avoid using cleaning products that are unsuitable for leather, as they may damage the material. For tougher stains, blot the area with a mixture of warm water and white vinegar, testing it first on an inconspicuous part of the sofa.
- Apply a leather cleaner liberally to the surface of the sofa using a microfiber cloth. Work in circular motions, covering all areas completely. Allow the cleaner to sit for ten minutes.
- Polish the sofa using a fresh microfiber cloth, using gentle circular motions. Avoid applying too much pressure. This will give the sofa a nice finishing shine.
- Finally, replace the cushions back on the sofa, and your leather sofa will look revitalised and fresh.
Must-Clean Living Room Items
Even the most spotless living room can lose its charm if key items are overlooked. In this section, we focus on those frequently used—and often forgotten—elements that make a noticeable difference when properly cleaned. From fingerprints on your television screen to tarnish on brass décor, here’s how to keep these must-clean items looking their best.

How to Clean a TV Screen
In the world of technology, there are a lot of things that can require some serious cleaning. This includes items like laptops, televisions, and other electronic devices. Have you ever wondered how to clean a TV screen? Many people are unsure of what products or techniques to use, but fortunately there is an answer out there.
The process of cleaning a TV screen is not an easy one. You will need to use a hoover to remove dust and debris that has settled on the TV from the air, and buff some surfaces to ensure that they are clean and free from fingerprints. Finally, There a numerous nooks and crevices that require cleaning in which dirt and dust can settle. You may also have some stubborn dirt that is hard to remove.
Our guide tells you everything that you need to know to give you the best viewing experience!

How to Clean Brass
To achieve a brilliant shine on your metal items using Brasso, put on gloves, shake the can well, and apply a small amount to a clean cloth. Conduct a patch test to ensure it doesn't damage the surface.
If successful, proceed by wiping the surface in small, circular motions, regularly buffing with a clean cloth to check progress. Repeat until clean, then remove excess Brasso with a clean cloth, using a cotton bud for crevices. Avoid letting Brasso dry on the surface to prevent residue.

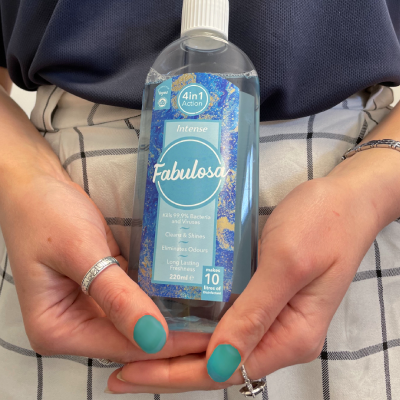
Fabulosa Concentrated Disinfectant: Cost Saving Solution When We Need It
Maintaining a germ-free environment is crucial, and Fabulosa Concentrated Disinfectant offers cost-saving benefits. Its strong concentration allows for dilution, maximising usage and stretching your budget. With reduced consumption and increased efficiency, it achieves exceptional cleanliness while saving money.
Just one 220ml bottle can fill 5 full spray bottles when diluted!
Its versatility covers various surfaces, eliminating the need for specialised products. Long-lasting and effective, it extends usage and reduces expenses. Switch to Fabulosa Concentrated Disinfectant and unlock remarkable cost savings while maintaining cleanliness.
Windows & Blinds
Windows
Your windows should be cleaned as part of your weekly routine clean. Depending on the material of your windows and sills, you should use different products. Start by cleaning the window frames, using a spray polish such as Pledge for wooden windows and sills or for uPVC use a cleaner such as Zoflora. To prevent over-spraying the product onto the glass, apply the cleaner or polish to the microfibre cloth and wipe.
To clean the glass, we’d recommend using a Robert Scott Micro Glass Cloth. These cloths are manufacturer using a special high absorbency material, designed to leave glass streak and smear free. No cleaning product is needed, all you need to do is fill a spray bottle with water, using the mist setting on a spray head to lightly wet the glass, and wipe.
The same polish or cleaner can be applied to the sills, so be certain to give these a wipe down too!
Blinds
If your living room contains blinds, its likely that they will either be vertical or roller binds. You've likely noticed that blinds harbour dust and given the large surface area (especially where there are multiple slats) it's not a surprise.
Blinds should always be cleaned as part of your regular cleaning regime, although once in a while they'll need a deeper clean too.
We'll show you how to clean each type of blind, keeping you window area clean and hygienic:
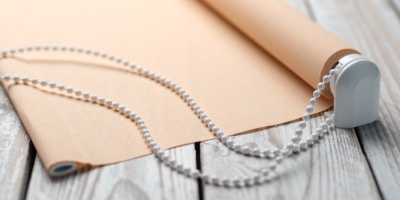
How to Clean a Roller Blind
The most effective cleaning technique is to use a vacuum cleaner. Unroll the blind, and vacuum from top to bottom using the upholstery brush attachment. Wipe damp with a damp cloth afterwards for a thorough clean, then leave to dry before re-rolling.
For any stains stuck to the blind, use an old toothbrush and brush along the grain to remove. A solution made with chlorine tablets can be used to treat any mould build up.
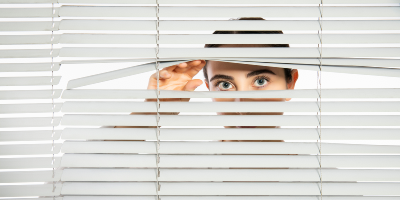
How to Clean a Venetian Blind
Extend the Venetian blind as far as possible, then use either a damp cloth or an extended reach duster. From top to bottom, clean each slat individually.
If your blind is metal or plastic, clean any stains using diluted disinfectant. For wooden blinds, spray with polish and wipe.
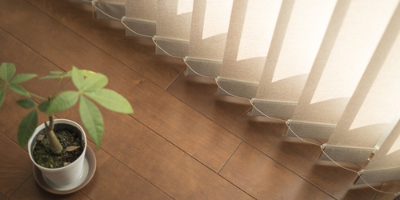
How to Clean a Vertical Blind
Vertical blinds can be effectively cleaned using either a damp cloth or a vacuum. Either wipe down with a damp cloth or vacuum thoroughly, using an old toothbrush to reach any into crevices on the headrail.
For a deeper clean, check the care label to see if your vertical blinds are machine washable. If so, remove from the headrail and wash on a 30°C wash. Otherwise, soak your blinds in a bathtub in a mild detergent solution made using a product such as The Pink Stuff Non Bio Laundry Liquid.
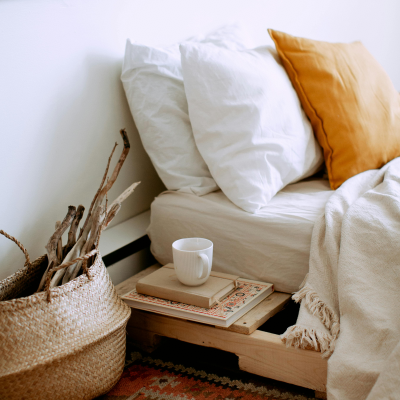
Bedroom
We all know that living in a messy environment is not the optimal way to live but have you ever stopped to think about how your sleep affects your overall productivity? Experts say that the quality of your sleep not only affects your memory, but also your mood, focus and creativity.
To help you get a good night's sleep, start with a clean bedroom. Your bedroom is where you spend a significant amount of time when at home, so it's important that it be comfortable and clean for you to sleep and relax in. Unnecessary clutter can make for a confusing room or trouble finding things you need.
Deep Cleaning Your Bedroom
We will help you return your bedroom to it's best condition, creating the perfect environment for a good nights sleep in a room that is free from dirt, dust and pathogens. Even better, we've narrowed it down to 5 simple steps, so it won't even take that long!
Our 5 recommended steps are as follows:

1: Clean the bed
Remove and wash your bed linen before starting (you should be doing this weekly already!)
Once stripped, vacuum the mattress to remove dust, making sure that you get into any crevices caused by padding and tufting. You can use the vacuum cleaner upholstery attachment to make this easier.
Full guides:
2: Wash your pillows
Pillows can contain bacteria and even agitate people sensitive to allergies.
Generally, pillows made of man-made materials (cotton, nylon and other synthetics) can be machine washed and dried in a tumble dryer. Always check the care instruction labels on your pillows for any specific care requirements!
Feather down pillows, or pillows filled with foam must be hand washed. Once washed, air dry.
Always ensure your pillows are completely dry before placing back into use. Failure to dry them correctly can lead to bacteria growth!

3: Clean walls and windows
Use a long vacuum attachment or feature duster to clean the wall edges and corners. Dust forget heating vents or air conditioner vents. Don't forget to remove any detachable light fixtures and clean these in warm soapy water, use disinfectant on high touch surfaces such as door knobs and a dry cloth to dust electrical switches and sockets.
The frames of your windows can be wiped down with warm soapy water, using a glass cleaner to buff the glass.
Remove your curtains and give these a wash as well!
4: Surfaces
From the highest surface to the lowest surface, wipe down using a damp cloth.
Empty any drawers or cupboards and vacuum the inside, making sure you reach into corners to remove all dust.

5: Clean the Flooring
First of all, if you have one in your bedroom, you will need to clean your rug. vacuum the rug and if possible, beat this outside to give it a good clean. Place the rug to one side to start cleaning the rest of the room.
For carpets vacuum the floor and for hard flooring vacuum first, follow up with a mop. Make sure you can access under the bed for cleaning. There may be a few dust bunnies underneath!
For our full deep cleaning guide, click here.
Electronics
Preserving the longevity and performance of your electronic devices goes beyond mere functionality; it's a commitment to technological well-being. Whether safeguarding your sleek gadgets from dust and scratches, ensuring your charging cables remain in optimal condition, or recognising the significance of regular maintenance for unexpected components like gaming controllers, this section is dedicated to the meticulous care of your electronic companions.
We understand that the finer aspects of electronic upkeep contribute to a seamless, efficient, and enjoyable tech experience. Delve into the articles here for insightful tips and tricks, guiding you in effortlessly maintaining a pristine and high-performing array of electronics in your daily life.

How to Clean an iPhone
From fingerprint-smudged screens to dust-laden ports, we've got you covered with a step-by-step breakdown of how to effectively clean every nook and cranny of your iPhone.
Whether you're a tech enthusiast or a casual user, maintaining a clean and functional iPhone is crucial for optimal performance and a satisfying user experience. So, let's dive into the details and ensure your iPhone stays sparkling and ready for action. For an in-depth exploration of each cleaning technique, be sure to check out our full blog dedicated to preserving the pristine state of your iPhone.

How to Clean AirPods
Maintaining clean AirPods is essential for optimal sound quality and hygiene.
To clean your AirPods, wipe all parts with a dry microfibre cloth, use a dry cotton bud to clean the microphone and speaker meshes, and a toothbrush to remove dust or wax. If exposed to chemicals, clean with a lightly dampened cloth and dry thoroughly. Disinfect the exterior with a non-bleach wipe, avoiding moisture in the meshes, and ensure all parts are dry before using or storing.
To clean your AirPods case, use a soft-bristled toothbrush or cotton swab for the interior, avoiding sharp objects, and wipe the exterior with a clean or damp cloth, avoiding ports. Disinfect the outer surface with a wipe and let it air-dry completely with the lid open before storing your AirPods

How to Clean a Laptop
Tired of your laptop screen covered in spit and dirt? From dusty keyboards to smudged screens, laptops can accumulate dirt and grime that affect performance and appearance.
Whether you're a student, professional, or casual user, a clean laptop not only enhances your computing experience but also extends the lifespan of your device. Dive into our comprehensive guide as we explore laptop cleaning tips and tricks that really work!
Car
For a lot of people, cars are the be all and end all when it comes to travel for work and leisure. At The Cleaning Collective, we want to help you keep your vehicle in top condition. From car interiors to exterior power washing, keeping your car looking good can sometimes be easier said than done.
Have a look at our articles around car cleaning and get ready to show off your shiny little get-around.
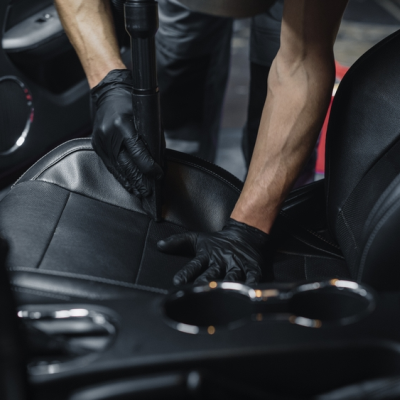
Cleaning Your Car
In this guide, we've covered the essential steps for thoroughly cleaning your car's interior while prioritising eco-friendly practices. From gathering supplies to tackling different materials like upholstery, leather, plastic, and glass, we've provided a comprehensive approach to achieve a sparkling clean interior. By incorporating environmentally conscious cleaning products, you not only enhance your driving experience but also contribute to a healthier environment for you and your passengers.
Additionally, we emphasised the importance of maintaining your car's exterior with eco-friendly washing methods, preserving both its appearance and the planet. By following these tips, you can enjoy a clean and pristine car while minimising your environmental footprint.
You
Maintaining personal cleanliness isn't just about appearance; it's about self-care and overall well-being. Whether it's keeping your favourite shoes spotless, ensuring your clothing remains fresh and vibrant, or even understanding the importance of hygiene in unexpected areas like sex toys, this section is curated for your individual care. We believe that the small details matter and that knowing how to properly care for these personal items contributes to a healthier, more comfortable daily life.
Explore the articles here for insightful tips and tricks that will assist you in maintaining a hygienic and polished 'you' effortlessly.
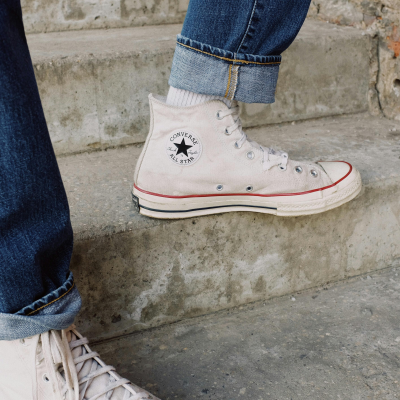
White Converse
Dive into our detailed guide on maintaining the timeless allure of your Converse shoes, whether they're classic white or any other colour. This comprehensive blog covers effective cleaning techniques, including the necessary supplies, step-by-step instructions for exterior and insole care, and tackling stubborn stains.
From removing laces to deodorising, this guide ensures your Converse shoes stay fresh and vibrant. Learn the best practices to retain your beloved pair's pristine condition with our expert tips and tricks.

Footie Kits
Explore our comprehensive guide, offering strategies and solutions for tackling the post-match dirt and grime that inevitably cling to your football gear. From practical stain removal techniques to utilising powerful, eco-friendly cleaning products like Ecozone Laundry Stain Remover and The Pink Stuff Oxi Stain Remover Powder, this guide ensures your kits remain fresh and vibrant.
Dive into our step-by-step methods for both kit and boot care, guaranteeing that the joy of the beautiful game continues, without fretting about the aftermath.
Wet Wipes
Unveil the versatility and indispensability of wet wipes with our in-depth exploration. Discover why these unassuming, moist sheets are a crucial asset for personal hygiene and household cleanliness. Whether you're a parent, a traveller, or someone striving for a pristine environment, our blog outlines the myriad applications of wet wipes. From skincare to surface disinfection, toilet paper substitutes to body care solutions, wet wipes offer unparalleled convenience.
Embrace their efficacy, portability, and eco-friendly options for a cleaner and more hygienic lifestyle. Explore how these unobtrusive wipes can transform your personal care routine, ensuring freshness and cleanliness on-the-go. Let us guide you through the numerous benefits of integrating wet wipes into your essential cleaning arsenal.

Sex Toys
Discover the importance of maintaining hygiene and safety with sex toys through our insightful blog post. We delve into the significance of regular cleaning, emphasising how it not only ensures personal pleasure but also guards against potential health risks. Explore our recommended best practices for effective cleaning and hygiene maintenance, ensuring the longevity of your toys and mitigating the spread of bacteria and infections.
From general cleaning tips applicable to all toy types to specific product recommendations like Abena Wet Wipes, UV-C sterilisers, and mild soap, our guide helps you navigate the essentials of sex toy maintenance. Learn how to handle shared toys, consider material compatibility, and practice proper storage to enhance your intimate experiences safely and hygienically.