Commercial Office Cleaning: A Complete Guide
Offices are a common work area used on a daily basis, often containing a high number of employees. Large open plan spaces, sometimes with hundreds of staff, are the perfect areas for germs to spread via touch surfaces and computing peripherals. What's more, the common practice of hot-desking (sharing a desk) increases this risk, highlighting the requirement for sound cleaning practices to ensure a hygienic and safe work space.
Suitable commercial office cleaning procedures and practices also contribute to measures put in place to minimise the possibility workplace injuries, reducing the risk of slips, trips and falls.
Cleaning Office Electronics
When carrying out commercial office cleaning, cleaners often worry about cleaning electronic items in an office. Questions arise as to which cleaning techniques and products are best suited for equipment such as a keyboard and mouse or monitor. The consequences of getting this wrong can be significant, as an incompatible product can cause irrepairable damage that renders an item unusable, with the price of some electronics running into the thousands.
Despite being ommitted from many cleaning schedules all together, common items can harbour more germs than most people expect. This is due to office electronics containing a number of touch points that are interacted with daily, such power buttons on your PC or monitor, or a keyboard whereby the majority of the surface is subjected to regular contact. This is especially important in offices where hot-desking occurs as multiple people use the same workspace, helping pathogens to spread via touch-point to hand contamination.
We've identified the key items that require cleaning and the steps to cleaning these effectively and safely below:
How to Clean a Laptop Screen/How to Clean Monitor Screen
Everybody wants a clean monitor right? Screens are regularly subjected to a build up of dirt and marks, including dust, finger prints, and even splashes of coffee if staff are not always careful! The majority of these marks do not do any long term damage, but who wants to work with a monitor that has distracting fingerprints when working? Cleaning a monitor isn't as easy as it might first appear, as you need be careful as to which products and techniques you use to prevent causing damage to the screens surface. Our guide will give you the information you need on how to clean a laptop screen/how to clean monitor screen clean effectively and safely.
Cleaning Steps
- Take a clean microfibre cloth that has no grit on the fibres. It's best to have a single cloth reserved specifically for screen cleaning.
Do not use a paper towel as these have an abrasive surface and can scratch a screen. Likewise, never use an old rag/t-shirt as these may be harbouring grit. A single spec of grit or an abrasive material can scratch the surface of a monitor screen. At a microscopic level microfibre cloths are extremely soft and are great for attracting dust and oils. - Using light pressure and with a sweeping motion from left to right and top to bottom, wipe the screen.
Avoid circular motions and don't buff in a single area - you might buff in a costly repair! - For any remaining marks, lightly dampen your cloth with distilled water and lightly wipe. If this still doesn't remove the remaining marks, you'll need some extra 'oopmh'. Mix 50% distilled water and 50% white vinegar, dampen your cloth and try again.
Refrain from applying cleaning chemicals to your screen, especially corrosive products. These may strip reflective coatings of screens or cause clouding - irreparable damage that will require maintenance or replacement parts.
How to Clean a Keyboard
Wondering how to clean a keyboard? Despite being an item that many people touch every day of the week, often with a second thought, keyboards have been shown to have more germs than on a toilet seat. An average keyboard has 3,295 germs per square inch, highlighting the importance of cleaning periphal computing devices.
If your keyboard is extenal to your computer, unplug the USB cable. If you have a laptop and the keyboard is built in, turn off the device and for peace of mind, remove the battery.
Right, let's get into the nitty gritty of how to clean a keyboard:
Cleaning Steps
- Initially, brush the muck out of your keyboard. You can use either a specialised keyboard brush, or alternatively use a toothbrush, to scrub the space between the keys.
- Next, turn the keyboard upside down and shake out any dust and dirt from within the keyboard. Canned air also provides an effective method of removing this dirt - place the nozzle between the keys and blast away!
- You may have some crumbs or dirt remaining that you cannot dislodge. To remove these, take a sticky note and fold it in half with the sticky edge on the outside. Run this along the crevice between the keys where any dirt remains. The dirt will stick to the sticky edge and be removed from your keyboard.
- Now it's time to sanitise the keyboard. Using an antibacterial cleaning wipe (such as Clinell Universal Wipes), wipe the full surfaces of the device including all of the keys and the flat surfaces surrounding the keys. Don't forget that the underside needs cleaning too.
How to Clean a Computer Mouse
Time to learn how to clean a computer mouse! Alongside your keyboard, the mouse is one of the items most regularly touched in an office, making it the perfect item to harbour germs. Luckily, a mouse has smooth, easy to clean surfaces, although some grips grooves can make dirt removal challenging.
Cleaning Steps
- Turn off your mouse if it's wireless, or unplug the mouse if it's wired.
- Using an antibacterial cleaning wipe, wipe the full outer surface of the mouse.
Refrain from using a cleaner in a spray bottle, as the amount of liquid can build-up on the outside of the mouse, drip through to the inside, and cause damage. - Using a wipe again, pay special attention to the mouse wheel. Clean the area that is visible, rotate, then clean again until you completed the full wheel.
- Take a toothpick, and clean out the grooves on your mouse. The grooves are found where two plastic components of the mouse meet, forming the perfect channel for dirt to accumulate. Some devices also have a rubbery-feeling grip with grooves that also require special cleaning attention.
- Finally, give the mouse one last wipe over to remove any remaining dirt that has been left behind.
Stay Connected
Want to hear more from The Cleaning Collective? Sign up to our mailing list for the latest offers and news
Office Desk Cleaning
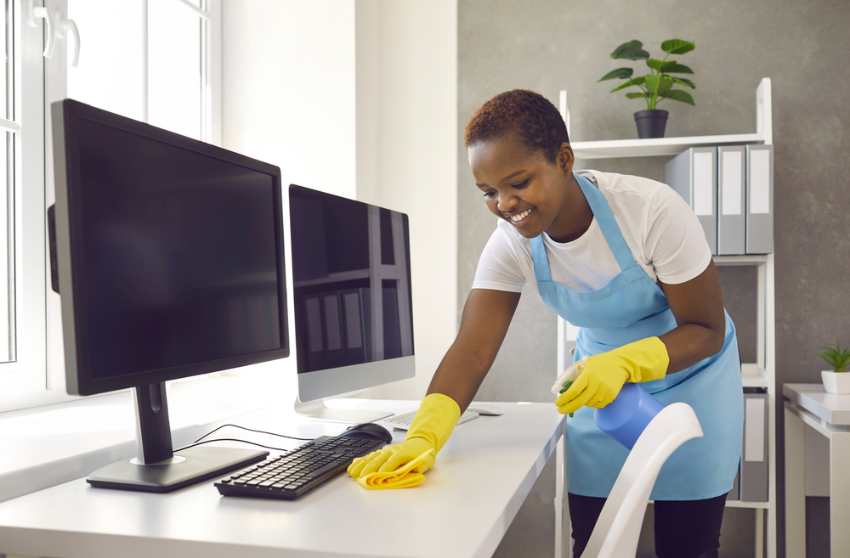
One of the most obvious focus areas during commercial office cleaning is the desk. As mentioned in the above section, in offices where hot-desking occurs germs may be spread from multiple people onto the work surface, whilst staff eating lunch at an office desk introduces the risk of food and drink spills. The good news is that desks are commonly designed with this in mind and often have a shiny easy to clean surface. The exception may be when a desk is manufactured with a real wood surface. These require a different treatment to veneered desks.
Cleaning Hard Surface Desks
Desks with hard surfaces are often made with veneer and are ideal for disinfecting and more often than not, any food or drink spillages can easily be wiped from the surface without further treatment. These types of desk are most often found in office buildings and they are common in home offices too.
Cleaning Steps
- Remove all items from the sufrace of the desk, including the keyboard and mouse. Avoid cleaning around easily moved items as the dust under these items will soon contaminate other areas of the desk.
Please note, it may be impractical to move monitors or desktop towers as these are heavy and plugged into the mains. If you accidentally knock a cable, a network connection may be lost or the computer power may be cut. Only move items when it is safe to do so. - Spray the desk with an antibacterial cleaner and leave for the required contact time.
A common cleaning mistake is wiping the surface straight away after spraying, as antibacterial products all have a 'contact time'. This is how long the product needs to be left on the surface to reduce bacteria to a safe level. If you simply wipe the product away without leaving it on the surface for the required time, bacteria will remain. - Using a microfibre cloth, wipe the desk until dry.
Cleaning Real Wood Desks
Desks made from real wood are sensitive to cleaning chemicals. Before spraying anything onto the surface, consult the manufacturers care instructions. Some cleaning products can leave surface blemishes and streaks if used, and with compressed air cleaners, propellant solvents may embed in the desk surface.
As with any surface, prior to cleaning, test your chosen product on a small inconspicuous area to ensure compatability.
Touch Surfaces
Frequently touched surfaces should be cleaned regularly as these are surfaces where pathogens can be easily spread via people. These surfaces should be identified on an office-by-office basis, as each office is likely to have some variation in design. These surfaces often include, but are not limited to:
- Door Handles and Knobs - Spray with antibacterial cleaner, leave for required contact time and then wipe with a microfibre cloth.
- Light Switches - Lightly dampen a cloth with antibacterial spray, then wipe the surface clean. Never spray a cleaning product directly onto a light switch.
- Grab Rails - Spray with antibacterial cleaner, leave for required contact time and then wipe with a microfibre cloth.
- Frequently Used Buttons (Such as on an Elevator) - Lightly dampen a cloth with antibacterial spray and then wipe clean. Never spray a cleaning product directly onto live electrics.
Cleaning Office Floors
Keeping office floors clean is not only important for creating a great first impression for customers and colleagues alike, floors remain the key hazard area for businesses with slips and trips being the most common cause of injury at work. The majority of slips occur when floors become contaminated or wet, with many trips resulting from poor housekeeping practices. It is the responsibility of the employer to control risks from slips and trips, including carrying out workplace risk assessments.
The commercial office cleaning function of a business can help control these risks, with a "see it, sort it" attitude from staff also helping to create a safer work environment. This includes:
- Prevent Floor Contamination - Take measures to prevent floors getting wet or contaminated in the first place, such as installing drip trays on dispensers to stop sanitiser or soap from reaching the floor.
- Encourage Good Housekeeping - Keep all workplaces clear with no trailing cables and dispose of packaging and wrapping material as soon as it's removed from a product. Magazine and newspaper inserts can be slippery, so be sure to monitor these for removal and recycling.
- Always Use Wet Floor Signs - Whenever there's a risk of a wet floor, use a wet floor sign. Following a risk assessment, in some circumstances it may also be required that the area is closed to foot traffic temporarily.
Any spills should be dealt with immediately to prevent them turning into permanent stains. Act quickly to soak up the spill with a white cloth (being careful not to rub) and absorb as much excess liquid as possible. Treat with a stain removal solution and let it dry thoroughly. Follow the tips below to ensure your office carpet looks good as new!
Procedures for both responsive and routine cleaning should be introduced:
Routine Cleaning
Hard Floors
Timely routine cleaning regimes are used to control contamination that is brought inside on footwear. The type of cleaning that needs to be carried out is dependant on the type of flooring that is in place.
Floors that have a polished finished require a periodic "strip and polish". A restorative procedure, a "strip and polish" removes all layers of polish and dirt from the floors surface using a specialised cleaning chemical, taking the surface back to it's original state prior to application of polish.
A "scrub and recoat" is carried out more frequently than a "strip and polish" to maintain the finish of the floor. If a "scrub and recoat" doesn't bring your floor back to it's shiny best, or the floor looks dirty after carrying out the procedure due to contaminants such as dirt being trapped between layers of polish, a "strip and polish" is required.
The importance of a specialised floor polish cannot be understated as it's application increases the slip resistance of the flooring, helping to prevent slips.
Finally, for regular floor cleaning a floor maintainer is used to remove dirt and grime, limit slip potential and keep your floor looking great.
An example cleaning schedule is given below, whereby a "strip and polish" is the least frequent procedure, a "scrub and recoat" is more frequent and a "maintenance clean" is the most frequent routine clean. Responsive cleaning is carried out as and when required.
- Routine Cleaning
- Strip and Polish: Yearly
- Scrub and Recoat: Monthly
- Maintenance Clean: Daily
- Responsive Cleaning
- Spills: Clean-as-you-go
Please note, this schedule is an example and is not suitable for all businesses. Frequencies are determined by the type of flooring, amount of footfall, the type of contaminants (such as sand from a beach or mud in the countryside) and also the required finish (a high shine will require more frequent polishing). This should be determined on a business-by-business basis in line with risk assessments.
Carpeted Floors
As with sparkling polished floors, maintaining clean carpets ensures a great first impression for those visiting, or working in, your business premises. Given the high volume of traffic office carpets are generally subject to, carpets may be more susceptible to discolouration, noticeable stains, and a build-up of daily dirt and debris that becomes trapped in carpet fibres, making them appear dull and grimy.
The cleaning method and the best carpet cleaning products for the task is determined by the type of cleaning you wish to undertake, from maintaining general cleanliness to targeting stubborn stains.
How Often Should You Clean Your Carpet?
Regularly cleaning your office carpet keeps it looking better for longer, can save money on professional cleaning services and is essential to its longevity and durability. Research has shown that carpets can be up to ten times dirtier than a toilet seat and vacuuming daily is ideal to limit not only dirt and dust, but allergens too.
Using a vacuum cleaner to regularly vacuum your office carpet is the most simple and effective way to lift dirt and prevent it becoming trodden into your carpet fibres. Keep your office carpets well maintained by vacuuming high traffic areas on a daily basis, and lower traffic areas two to three times per week.
For plant-based and synthetic carpet fibres, turn on the rotating brush and move the vacuum in different directions over the carpet to agitate and loosen dirt. A bristle-ended carpet flooring attachment can also be used to remove any ground in dirt. This method may not be suitable for all types of carpet, so follow the care instructions closely to avoid causing any damage.
Deep Cleaning
Traditional carpet shampoo remains a popular cleaning method, due to its ease and affordability. For optimum results, use or hire a carpet cleaning machine. Follow the manufacturer’s instructions to fill the machine with water and the correct amount of cleaning solution. Don’t be tempted to overfill! Next, moving at a slow pace, begin in the corner of the room and push the machine in a straight line to the opposite wall. Repeat this process in the opposite direction as though you were mowing the grass. Be sure to follow the manual and leave the carpet to dry for as long as possible.
If you would prefer to shampoo the carpet by hand, apply the cleaning product to the carpet and spread thoroughly with a dry brush. Ensure even coverage for a thorough clean and leave the product for the instructed time, or at least 30 minutes. Use the vacuum cleaner to remove the product and the dirt.
Responsive Cleaning
Hard Floors
If contamination occurs, clean this up ASAP. Absorbant spill powder, such as Sanitaire Clean Up Powder, the spill can be scooped away easily and disposed of.
Carpeted Floors
Stain Treatment
In the same way as you would for hard floors, if contamination occurs clean this up ASAP. Use an absorbant spill powder, such as Sanitaire Clean Up Powder, can also be used on carpets and are effective at soaking up an liquids before they fully soak in. As with hard floors, once absorbed into the powder the spill can be scooped away easily for disposal.
Treating a stain as fast as possible will ensure a higher change of removing it successfully. For isolated spills, after blotting excess liquid and using a pre-treatment if required, use a commercial spot clean solution such as Ecolab Carpet A. Simply spray onto the area to be treated, allow to dry, and vacuum.
For dried on stains, use a stiff brush to loosen and remove the debris. Spot treat as outlined above, and deep clean as necessary. Removing any tough stains in this way will ensure your deep cleaning method is most effective.
An Environmentally Friendly Alternative: Baking Soda Cleaning and DeodorisingAn inexpensive and natural cleaning product, baking soda is an effective alkaline product which works to remove stains and neutralise odours. For targeted cleaning, first determine whether the stain is greasy (spills containing oily residues such as lotions) or non-greasy (for example, tea or ink).
For non-greasy stains:
- Vacuum the area
- Completely cover the area requiring attention with baking soda
- Using a misting bottle, lightly spray the baking soda with cold water
- Leave the baking soda for several hours, or ideally, overnight
- Vacuum the area and assess the stain. Repeat as necessary
For greasy stains, begin by blotting up as much of the residue as possible with a microfibre cloth. Follow the process above, skipping step 3 to allow the baking soda to absorb any grease.
To freshen and remove any unpleasant odours, vacuum the carpet before sprinkling the baking soda liberally over the area requiring attention. Use a dry brush to distribute the baking soda evenly into the carpet fibres and leave for up to 24 hours. Vacuum thoroughly and repeat as necessary.
Please note, the baking soda method will not kill bacteria. Try a different method of cleaning if this is your main aim.
Stay Connected
Stay connected and be the first to know about our latest products, special offers, and exciting news:The Cleaning Blog
Want to learn more about cleaning? From the latest cleaning and hygiene news to handy how-to guides, why not check out our most popular blog categories.Stay Connected
Stay connected and be the first to know about our latest products, special offers, and exciting news: